Lecture application
The lecture application provides basic presentation capabilities, plus the ability to monitor and interact with students. (If you would like to have this app customized for your needs, contact us and we'll try our best to help.)
This app can be used in several modes:
-
Stand-alone. If you don't want to connect to a network, you can just plug your tablet into your project and use this app. It gives the ability to load pdfs, create blanks pages or clone existing ones, change pen color, etc. A particularly popular feature is the "laser pointer;" it changes the pen color to bright red, but the strokes disappear when you enter another stroke; this gives you the ability to point to something without your screen getting cluttered with odd strokes. -
Remote lecturere mode. If you have another computer to connect to your projector, and you have a wireless network to connect your tablet, you can present while walking oaround the classroom writing on your tablet. -
Connected mode. If your students also have tablets, you can see what they are doing, and interact with them, using the "dashboard." If they all have tablets, that's great, but even if only some of the have tablets, it can be very useful to see what they are writing. You can also project student work when you choose to.
User's guide
In this app, there are two interfaces, the lecturer's and the students'. They are similar, but the students have fewer buttons - they can't, for example, load presentations. Furthermore, the lecturer's display changes slightly when it is in "dashboard mode" - that is, monitoring students. We discuss the two states of the lecturer's app; the buttons on the student app do the same things.
Here is the non-dashboard lecturer's interface:
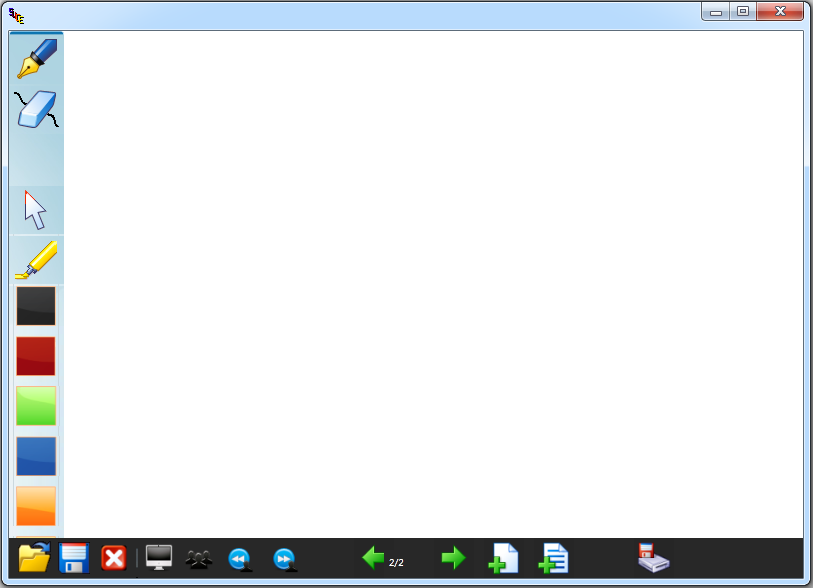
The buttons on the left are mainly obvious: Go to pen mode, erase mode, laser pointer mode, and highlight mode, and change colors. is where you start, but you can change to
Here are descriptions of the buttons on the bottom toolbar:
 |
Load a previously-saved Slice document; you will probably not use this button; instead, you will save presentations as pdfs. |
 |
Save this presentation as a Slice document. Again, you are more likely to want to save your document as a PDF. |
 |
Terminate this presentation. |
 |
This button switches to dashboard mode; see below. (The icon before and the two after have no purpose when not in dashboard mode.) |
| Go to the previous or next page. | |

|
Add a new, blank slide after the current one. |

|
Add a copy of the current slide after it. |

|
Load a PDF document. |
After entering dashboard mode (by clicking the "heads" icon), you will see the page of one of the students; it will be the same page you were on before clicking the button. You will be able to tell if the student has written anything on the slide. The four dashboard icons become important. Here is what the screen looks like:
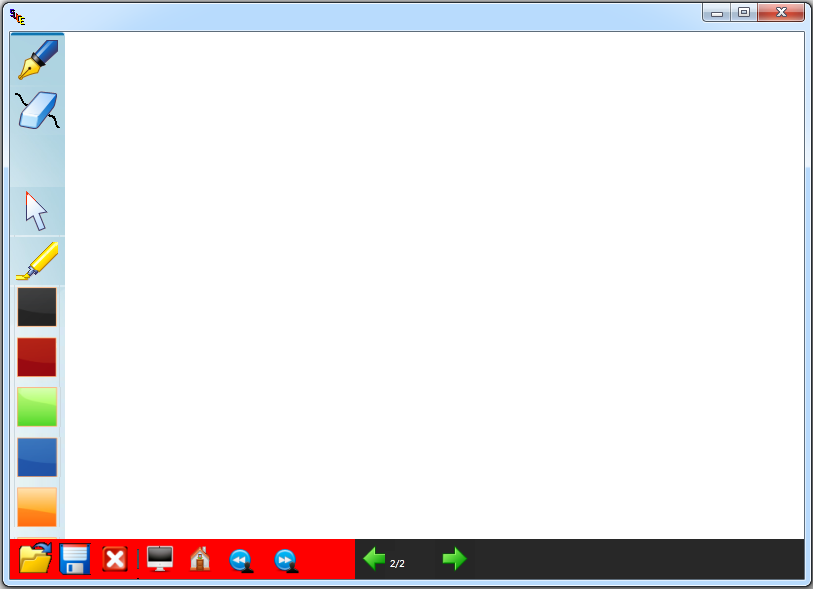
The four dashboard icons now have these functions:

|
Display the work of the student you are currently seeing. |

|
Return to non-dashboard mode |
 and and 
|
Look at the next or previous student's work. Note that this will show the student's page corresponding to the page you were on when you entered dashboard mode. While looking at a student's work in dashboard mode, you can still use the next and previous page buttons to navigate within that student's pages. will go to the original |